

BASIS
for Final Cut Pro
Welcome to the
Colour Grading End-Game
Meet BASIS – The best Colour Grading Plugin for Final Cut Pro

BASIS

Exposure

Colour Grading should NOT be this hard!
BASIS makes colour grading easier, faster and better.
Everything behaves as RAW or In-Camera-Adjustments would.
Photometric Exposure
All adjustments are colour space aware and photometric.
This means changing exposure by one stop with BASIS means changing exposure by one actual stop.
→ Learn More
Balance anything. Really!
Balance your image and correct even the most challenging shots effortlessly.
Thanks to BASIS’ colour space awareness, all balance adjustments are performed utilising linear gain, which is the standard for balancing operations in high-end colour grading workflows.
→ Learn More
The best Curve that ever existed
BASIS’ tone curve looks familiar, but is an absolute game changer. We’re not kidding.
WARNING: You will probably never use another curve again afterwards.
→ Learn More
Sliders you know and love
Adjust Contrast and Tone of your image with our intuitive sliders.
But you will probably use the curve…
→ Learn More
The Best Colour Science in the Business. Period.
Setting a new standard of colour grading in Final Cut Pro
Tungsten with incorrect White Balance
This scene was shot under tungsten-coloured light with an improperly set white balance. Usually, correcting this shot would require a lot of effort, since it is log footage, not raw footage.
With BASIS, this correction has been achieved by touching the balance wheel once.
That’s it.
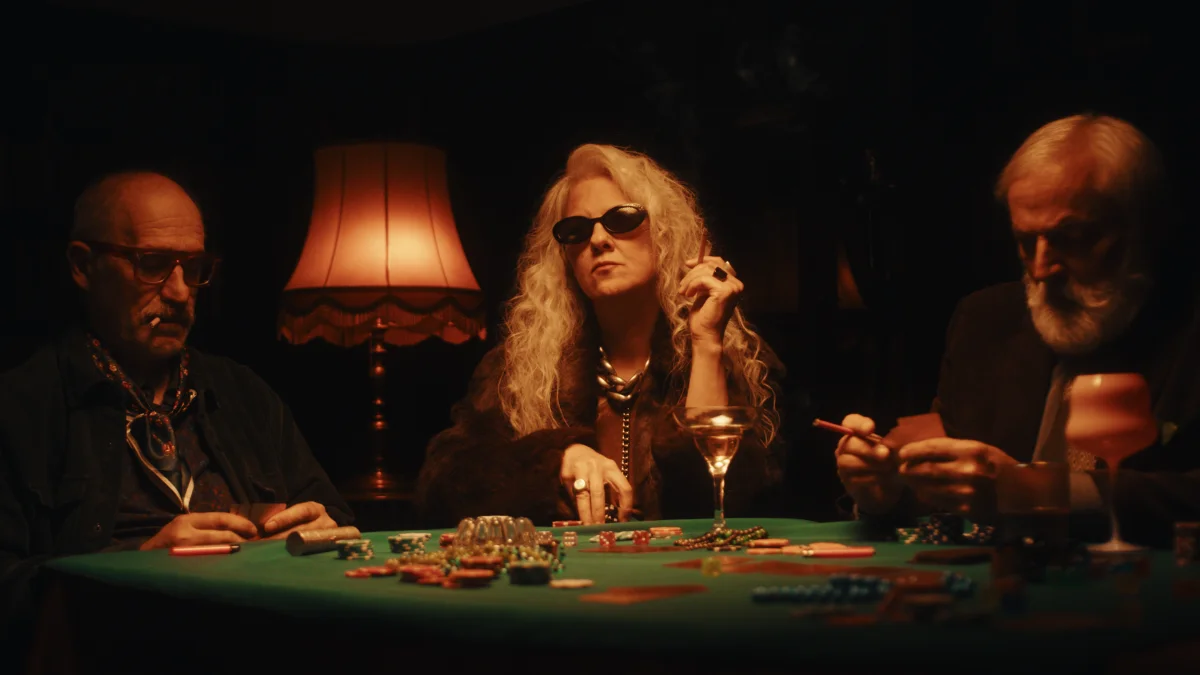 Before
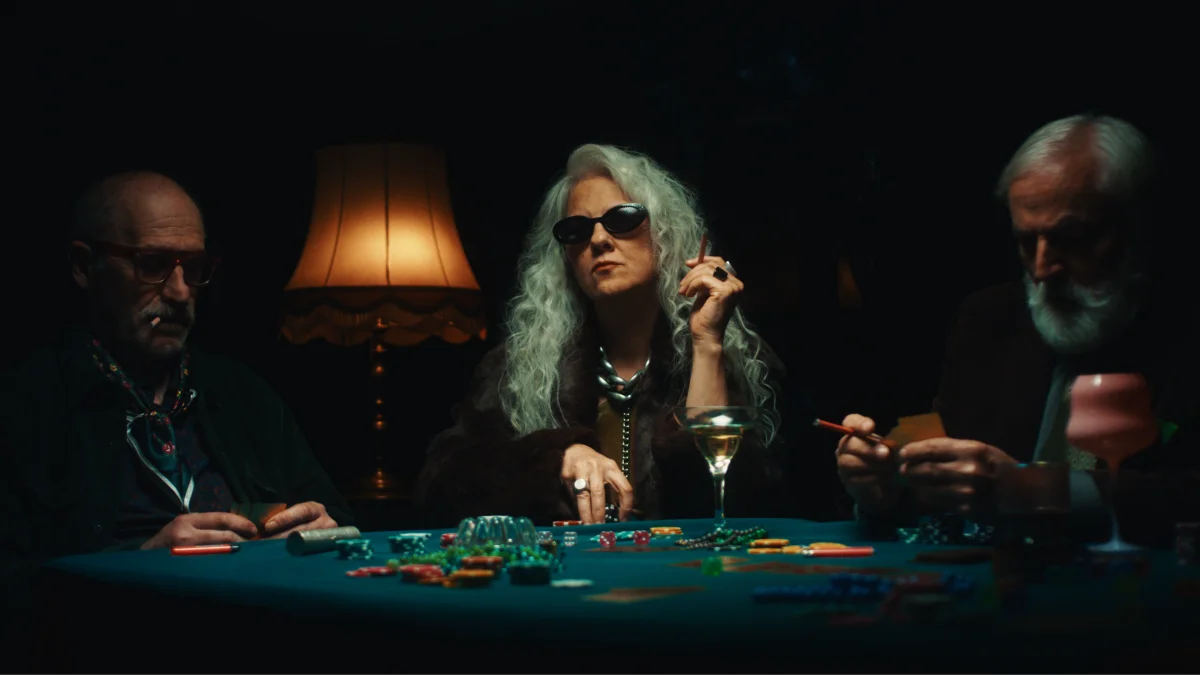 After
After
Underwater Footage from Action Cameras
You’re looking at footage from a DJI Osmo Action 4. Correcting this shot was achieved by taking advantage of a proper working colour space, using our Colour Space Transform Plugin for Final Cut Pro.
After the shot had been transformed to KOLOR Default, a few tweaks with BASIS were already enough.
 Before
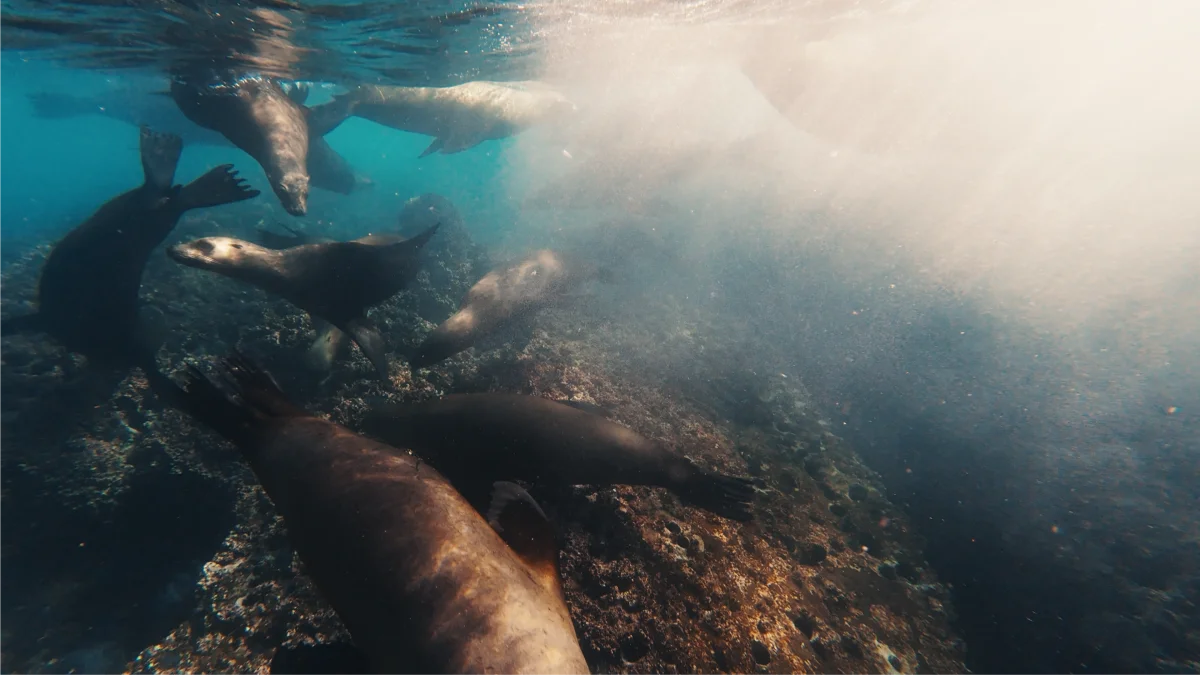 After
After
Footage generously provided by diver Andreas Abstreiter from bluewavefilms.de
Under Water Footage from Any Camera
Under water footage is one of the most challenging types of media to work with. Even when it comes out of a solid camera, like these shots in V-Log from a Panasonic GH5, colour correction can be a pain.
Thanks to BASIS, you can recover these images and share your memories just as you saw them beneath the surface.
 Before
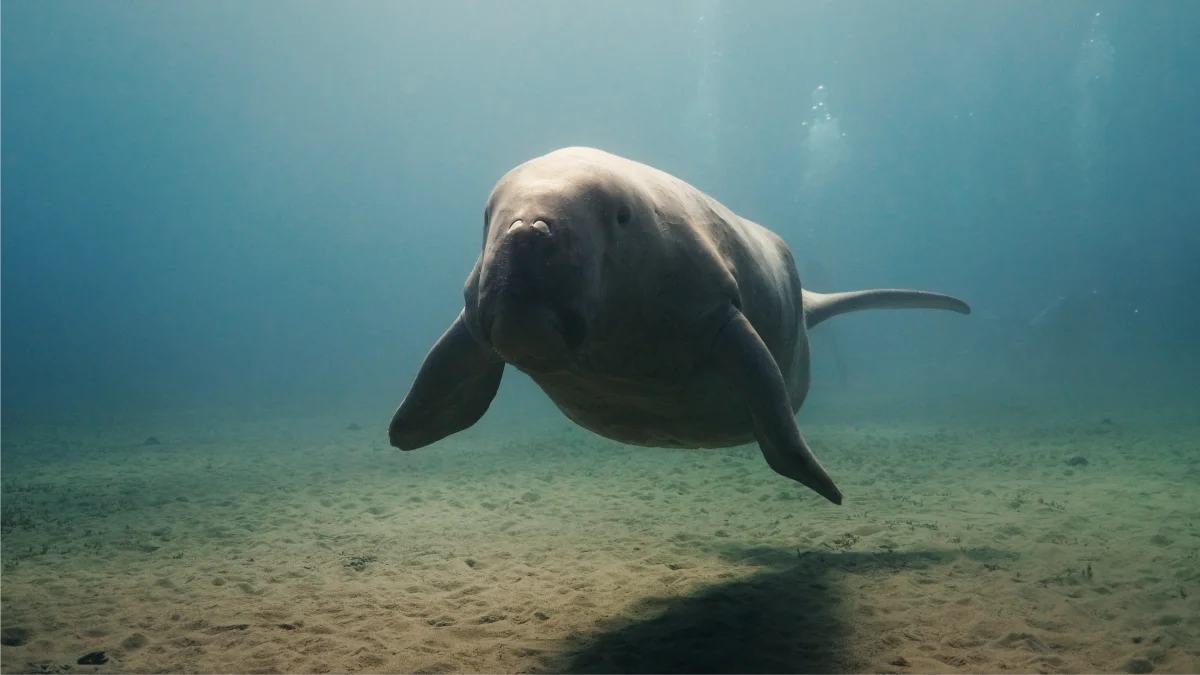 After
After
Footage generously provided by diver Andreas Abstreiter from bluewavefilms.de
Reinventing the Wheel
To make the impossible possible
Traditional White Balance
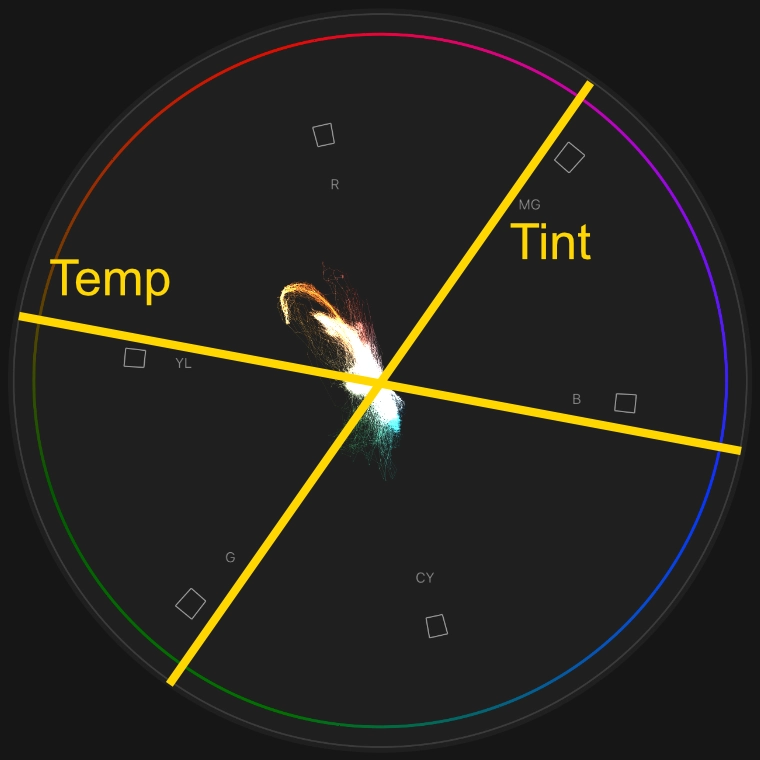
Traditionally, balancing a shot requires adjusting temperature and tint sliders.
The temperature slider makes your image warmer or cooler. The tint slider shifts your image towards green or magenta.
We can illustrate these sliders inside the vector scope as temperature and tint are just two arbitrary axis inside the colour circle.
But why do we use two linear sliders to move inside a circular colour wheel in the first place?
If this video doesn’t play automatically, please wait a few seconds or check your browser settings.
Balance using the Vector Scope
Since we want to move the signal mass across colour circle, why not just grab it and move it?
In this video, you can see that our footage is pretty warm.
The vector scope shows all the signal mass in the north-west area of the colour circle.
To balance this image, we therefore need to pull the image to the south-east area.
So we just grab BASIS’ Balance Wheel and do it.
Control Points on Curves are for Cavemen
Welcome to the Future, where we use our Mouse

Adjust Region Value
Adjust the value of whites, highlights, midtones, shadows and blacks by clicking and dragging.

Reset Region Value
Double click a region to reset its value. This leaves adjustments to contrast, pivot, shoulder and toe intact.

Adjust Contrast and Region Contrast
Hover over the midrange and scroll to adjust the overall contrast of your image. Hover over the highlight or shadow region to adjust highlight- or shadow-contrast respectively.


Reset Contrast and Region Contrast
Click the middle mouse button or hold ALT and left-click to reset the contrast.
Attention! This leaves your previously set pivot intact.

Adjust Pivot and Region Pivot
By clicking and dragging using your right mouse button, you can change the pivot of the general contrast, the highlight and the shadow contrast respectively.

Reset Everything
Hold CMD and left-click anywhere to reset the entire contrast and tone adjustment.
Loved by Everyone
Why we’re convinced BASIS is the best Colour Grading Plugin for Final Cut Pro

Jasmin Schulz
BASIS is way ahead of the competition in my opinion when it comes to Final Cut. I haven’t come across anything else that integrates so naturally into the workflow while delivering such useful results.

Brad West
BASIS has completely changed the way I grade LOG footage in Final Cut Pro. The tools are intuitive and easy to use, and a proper color pipeline makes grading faster, more enjoyable, and consistently delivers better-looking results.
Elevate your Colour Grading today
Download BASIS
for Final Cut Pro
Free Trial
- ✔
- All Features Available
- ✔
- Works for an unlimited amount of time
- ✔
- Instant digital Download
- ❌
- Puts a Watermark on your Image
0 €
Full Version
- ✔
- Free Updates within one Generation
- ✔
- Instant digital Download
- ✔
- Install on as many Macs as you personally own
- ✔
- No Subscription
Business License
- ✔
- Same features as the Full Version
- ⚠️
- Businesses need to purchase as many seats as they need – One seat per person
per seat
System Requirements: 🖥️ Apple Silicon Mac – 🍎 macOS Sonoma or later – 🎬 Final Cut Pro 11.1.1 or later
Any Questions?
Frequently asked questions about BASIS
Sure thing! Even better, use BASIS in tandem with our free Colour Space Transform for Final Cut Pro and always provide the right inputs for your LUTs no matter your footage.
Since BASIS is colour space aware, it can apply its balance using linear gain which is equivalent to changing the white balance captured by the camera and provides cleaner and more accurate results.
Yes! All gestures work on a trackpad, too. You just have to have secondary click (right click) enabled. For resetting contrast adjustments you can use ALT + Left Click instead of clicking the mouse wheel.
Yes! Just select all clips in question and double-click BASIS. However, we do recommend you colour manage your clips first by transforming them to KOLOR Default using our free Colour Space Transform for Final Cut Pro.
Yes, using our free Colour Space Transform for Final Cut Pro ensures you have all the flexibility you need. By default, BASIS only supports true and proper log colour spaces.
If you’re working with D-Log M, Rec.709 or anything else not natively supported by BASIS, please use our free Colour Space Transform for Final Cut Pro.
Please note that the effectiveness of BASIS with non-log footage may vary as it cannot reconstruct information that is not there in the first place. This especially affects BASIS’ balance wheel.
Hue, Saturation, Density and many more are not considered primary adjustments. BASIS is for the basis; the primary colour grade.
To adjust secondaries, you will need SPEKTRUM.
BASIS increases saturation using subtractive saturation. This means, just like in the real world and in analogue film, colours get darker as they increase in saturation. This also prevents colourful surfaces from ending up looking like they emit light.
We believe this is the best method to adjust saturation.
Release Notes
Information about Updates, Releases and Patches
- initial release

